Integrating Github with Gamemaker Studio
For the first TA devlog this semester, we'll be doing a tutorial on how to integrate Github with Gamemaker Studio.
Github is a version control tool that you can use for project collaboration. While it's not necessary for CPI111, we highly recommend using Github for your final project, as it will make group collaboration easier.
IMPORTANT: Only ONE person in your group needs to create the Github repository and Gamemaker project. This tutorial is divided by the creator and collaborators; find the section that pertains to you and follow accordingly.
Project Creator
How to make a Github repository
Step 0.5: Create a Github account.
If you don't have an account for Github, you can sign up at https://github.com/ .
Step 1: Download Github Desktop.
Visit https://desktop.github.com/ and follow download instructions for your OS. Sign into your Github account once downloaded.
Step 2: Create a new repository.
A repository is another name for a project in Github. When creating a repository, you will be creating the folder that will host the project you want to collaborate on. For this class, it will host your Gamemaker projects.
In the Github Desktop app, select File->New Repository. This screen will show up.
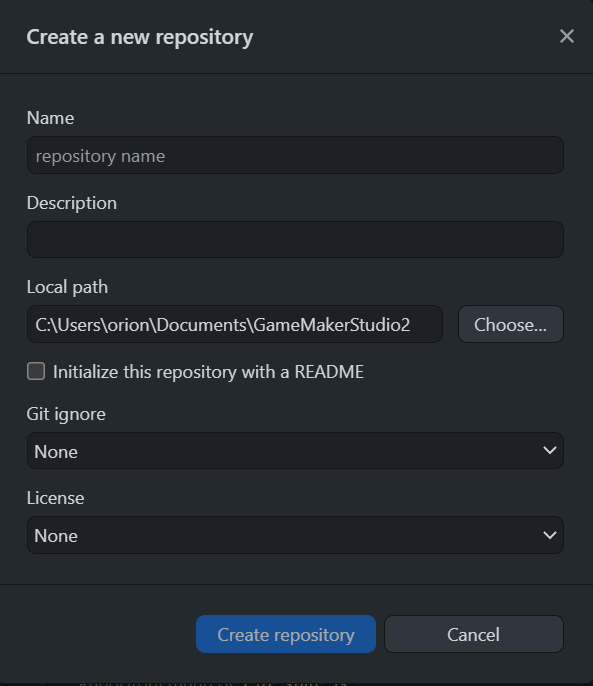
When choosing a name, it's generally good practice to name your repository the same name as the project itself. Choose any path for your repository. For this class, it's recommended to keep your repositories in your GameMakerStudio folder, as your project path will default to that folder. The way you organize your files is up to you, but it's important to remember where you store your repositories.
Step 3: Create your GMS project.
Open up GameMaker Studio and create a new project. The file location for your project should be inside the Github repository folder you just created. Once your project is created, the repository folder should look like this:
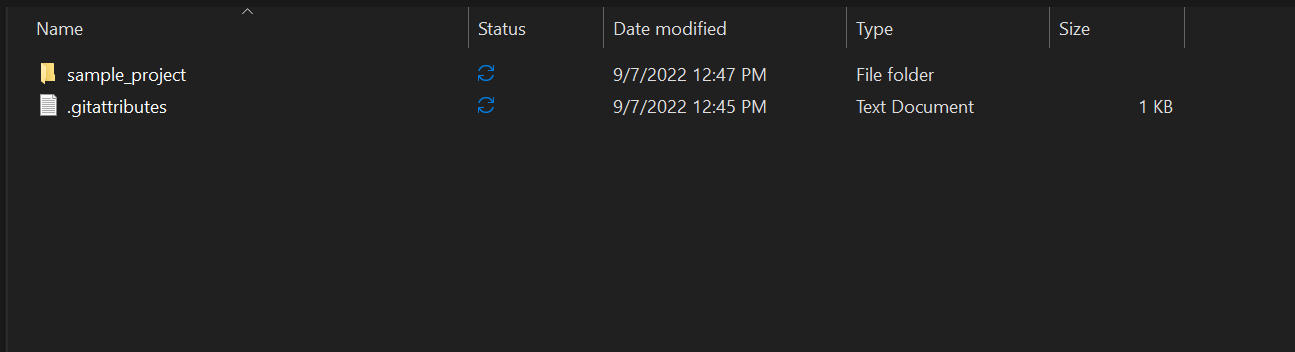
sample_project is the name of the GameMaker Studio project, and .gitattributes is the text document created by Github to track project changes. If done correctly, your Github Desktop screen should look like this:
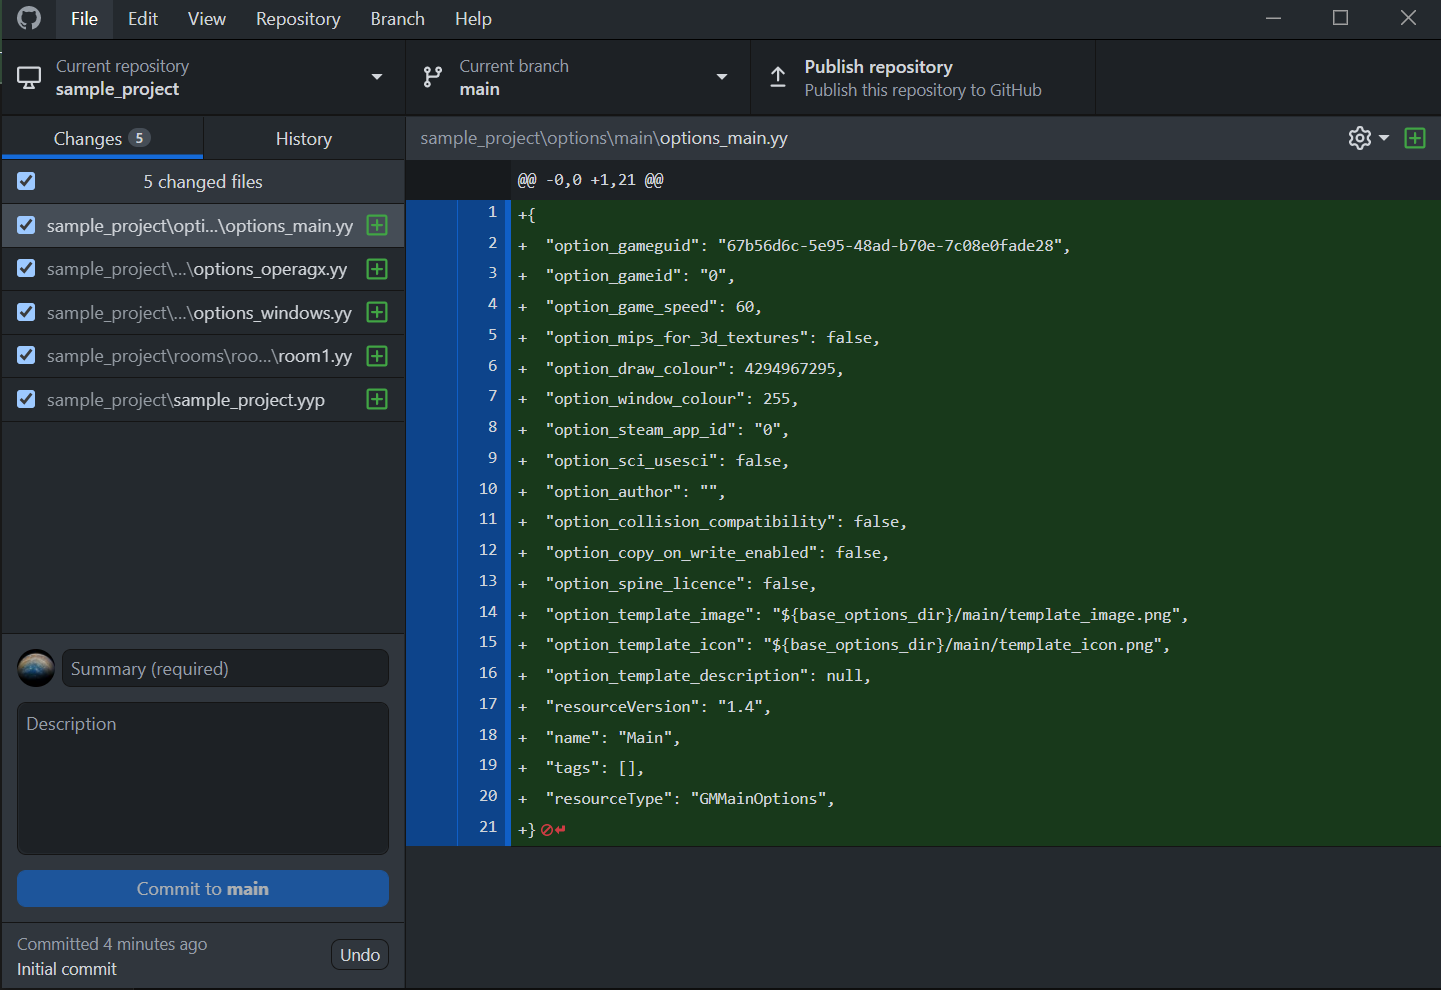
Step 4: Publish your repository.
Click the "Publish repository" button and publish your repository to github.com. You can choose whether or not to make your project public or private. Since this is a school project, private is recommended to avoid any academic dishonesty.
Step 5: Edit your project.
Your project is now integrated with Github! If you edit anything in your project, you can see those edits reflected in Github Desktop. Take some time to add objects and sprites to your project and see how they're reflected in Github Dekstop.
How to invite collaborators to your Git repository
Step 1: Gather your teammate's Github usernames and emails.
If you created the repository, reach out to your teammates for their Github usernames or their emails. Either one is sufficient to invite a teammate.
Step 2: Send an invite to your teammates through Github.
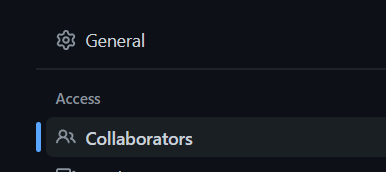
Head to https://github.com/ and open the repository for your project. Click on the Setting button at the far right and click on the Collaborators button under "Access". Afterwards, click on the Add People button and enter your teammate's usernames or emails. Click "add" to send the invite.

Step 3: Have your teammates accept the invite to the repository
Your teammates should receive an email invite to the repository after you add them as a collaborator. Make sure they open the email and accept the invitation.
Project Collaborator
How to download a Github Repository
Step 0.5: Create a Github account & download Github Desktop.
If you haven't already, go to https://github.com/ and create an account. Once you have an account, visit https://desktop.github.com/ to download Github desktop to your OS.
Step 1: Open the repository on github.com
When you visit https://github.com/, the list of your repositories should be visible on the left side of the screen.

If your project is not visible, then check with the project creator to see if they added you to the repository. If they have, check your email for the project invitation.
Step 2: Click on the green 'code' button
Once you're in the repository home page, click on the green "Code" button.
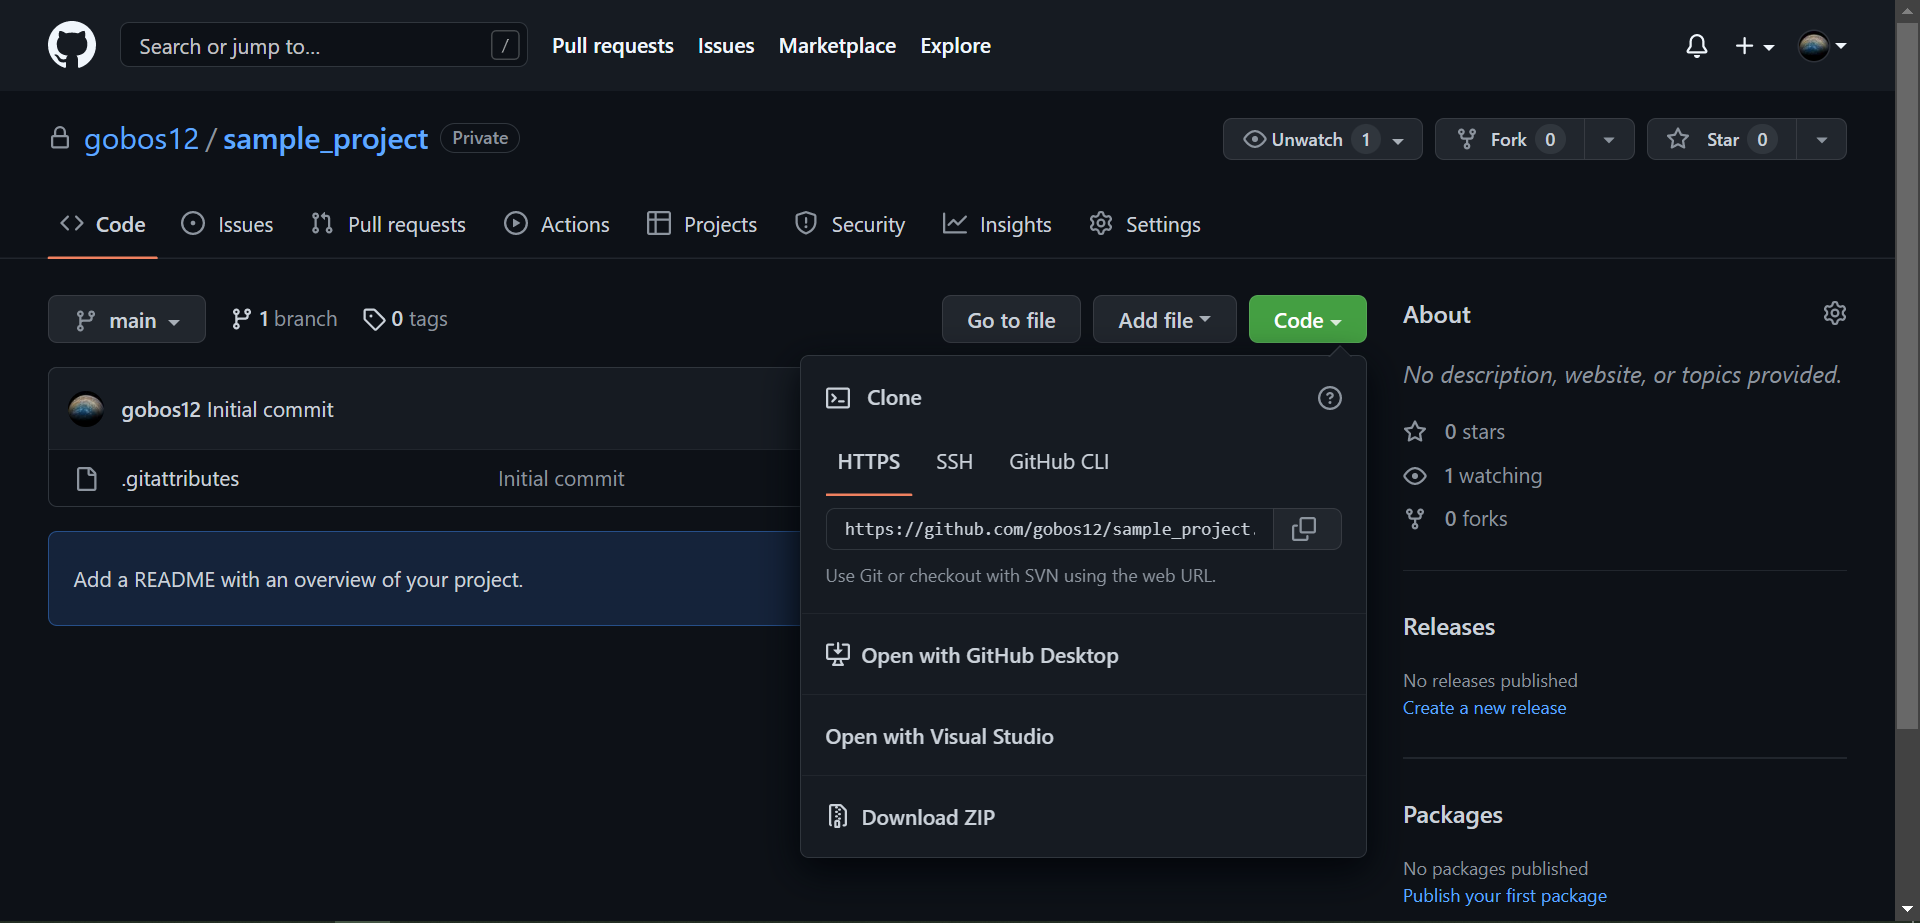
From here, you can clone your repository to your device. There are multiple ways to do this, but the easiest way is to click on the "Open with Github Desktop" Button.
Step 3: Clone to repository to your device.
Once Github Dekstop opens, it should look like this:
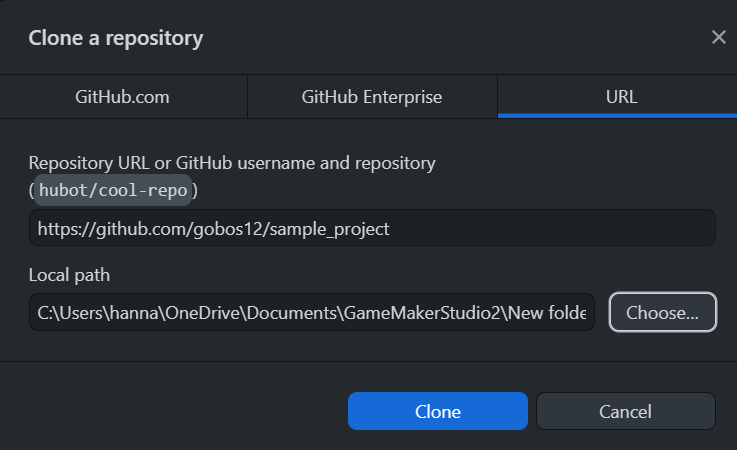
Choose the path on your device you want to clone the repository to. Github won't allow you to clone repositories to folders that already contain items, so make sure you're cloning the repository to an empty folder.
Step 4: Open the project in GMS.
The project is now on your device! You can open the project from the project folder. Mess around with the project by adding sprites and objects and see how the changes are reflected in Github.
How to navigate Github
GitHub Commits and Origin
The Origin is what GitHub recognizes as the official data stored in a project. Until the changes you make in GMS are pushed to the Origin your collaborators will not be able to see the work you’ve done. Here's how you do that:
Once you’ve reached a stopping point in your work, you will need to commit the changes you’ve made. Simply give the commit a name and brief description so that your team knows what changes were made and press the “commit” button.
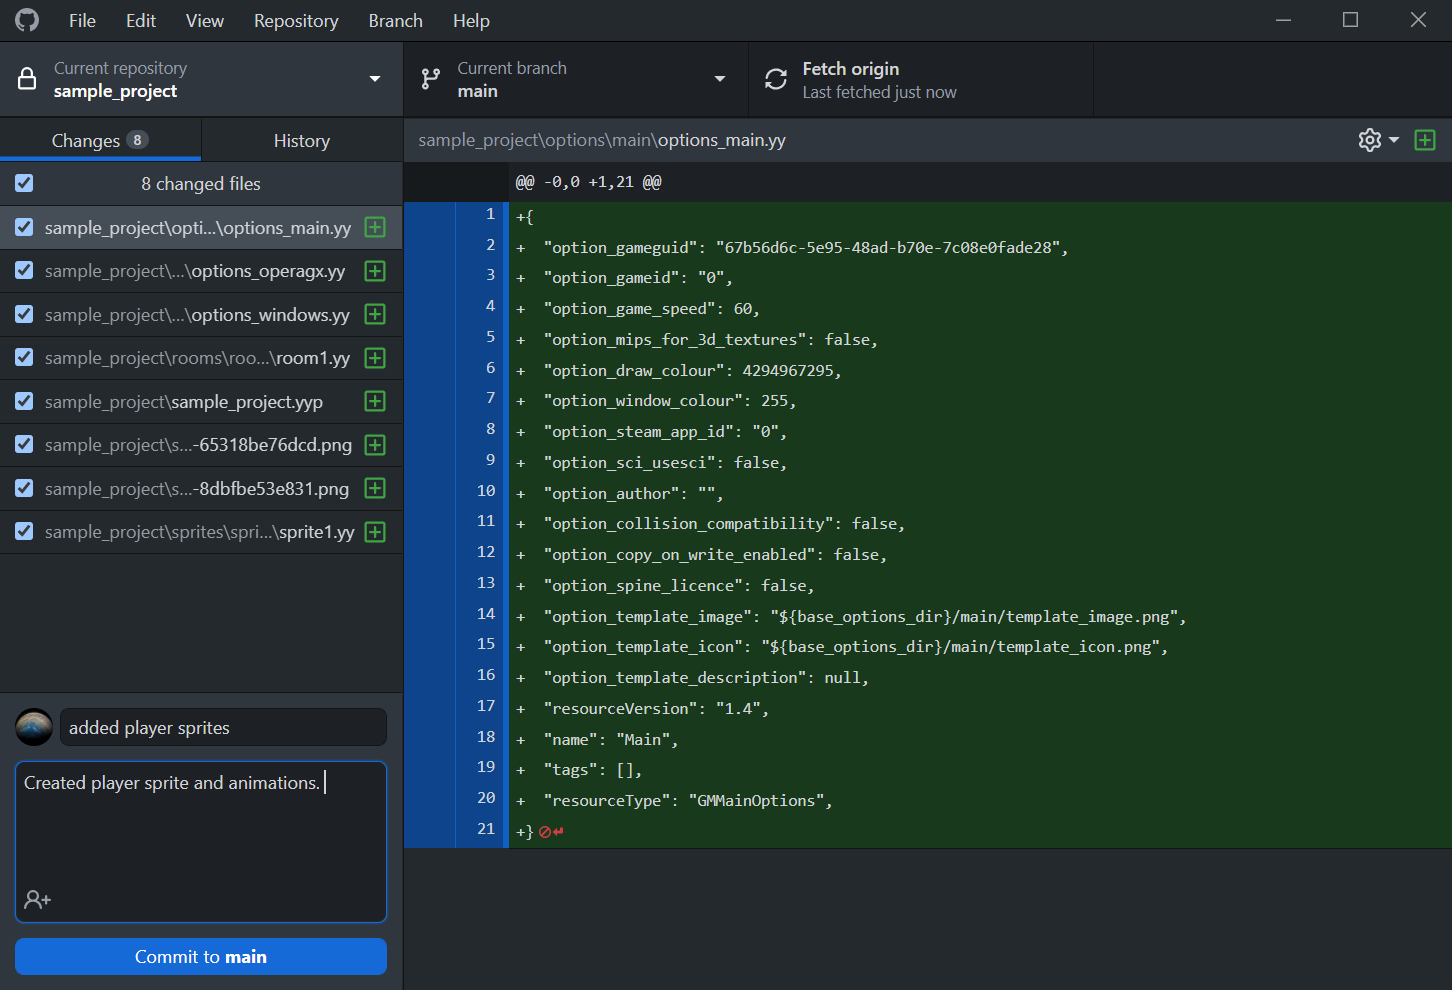
After you’ve created a new commit and want to share it with your team, press the “Push to Origin” button to officially update the repository project.

To access the work your teammates have already pushed to the origin, click the “Fetch Origin” button to check if there are any changes to the repository. If there are click the “Pull Origin” button. This is to change your project to match the official repository and can access the changes your teammates made.
IMPORTANT NOTE: If you try to pull from the origin while you have changes or un-Pushed commits, conflicts are likely to arise and can force you to “manually merge” them together or save your changes locally and place them back into the repository after your pull. This can be very complicated and is why it is suggested to communicate with your team and check for available pulls before working on your project.
Making Separate Branches
Every project starts off with the Main branch, but when you start your work you should make your own branch. A branch made off of main is essentially a copy of the main project that you can make local changes to, without affecting the main project. This means that multiple people can work on the same project at the same time without affecting the workflow of other people.
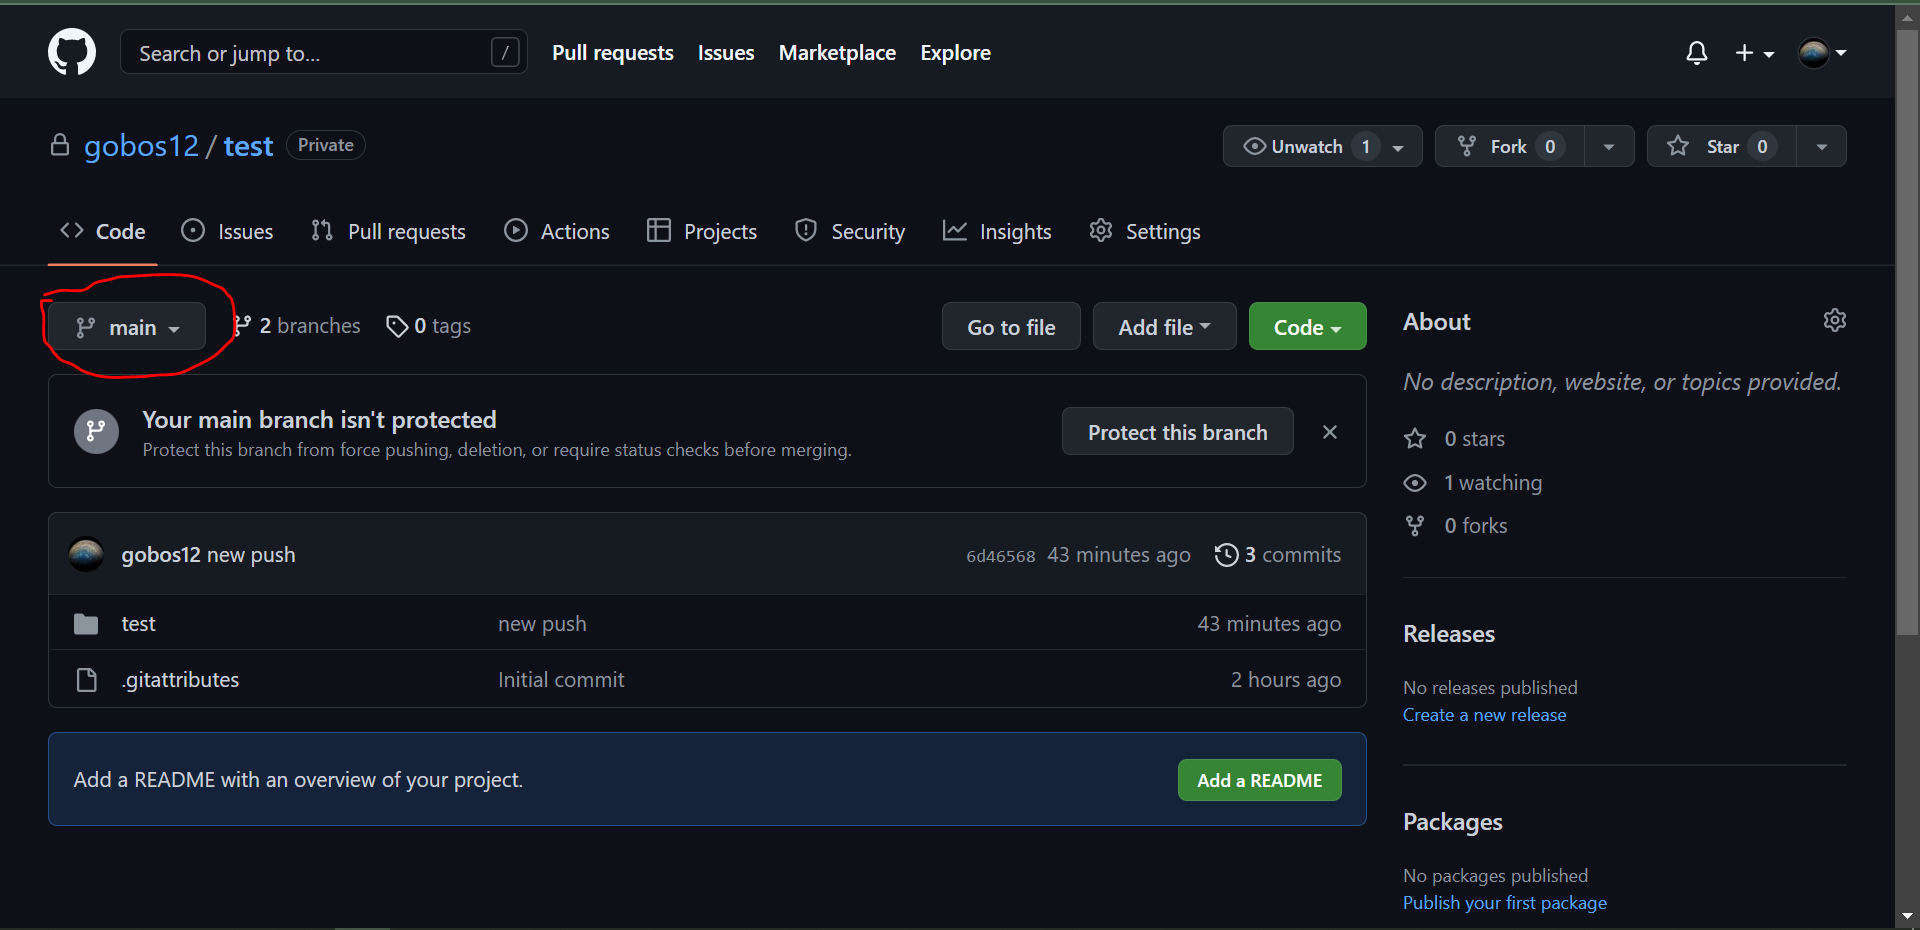
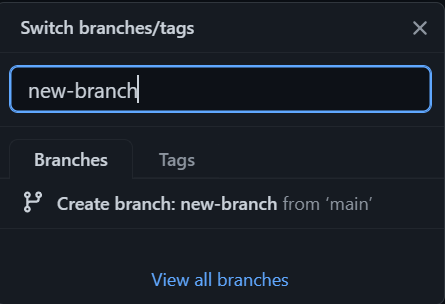
Usually, you make a new branch every time you start working on a new part (like a new feature or uploading new artwork/assets) of the game. To make a new branch, click on the 'main' branch button on your repository home page. Name the branch whatever you'd like, and then click on "Create branch".
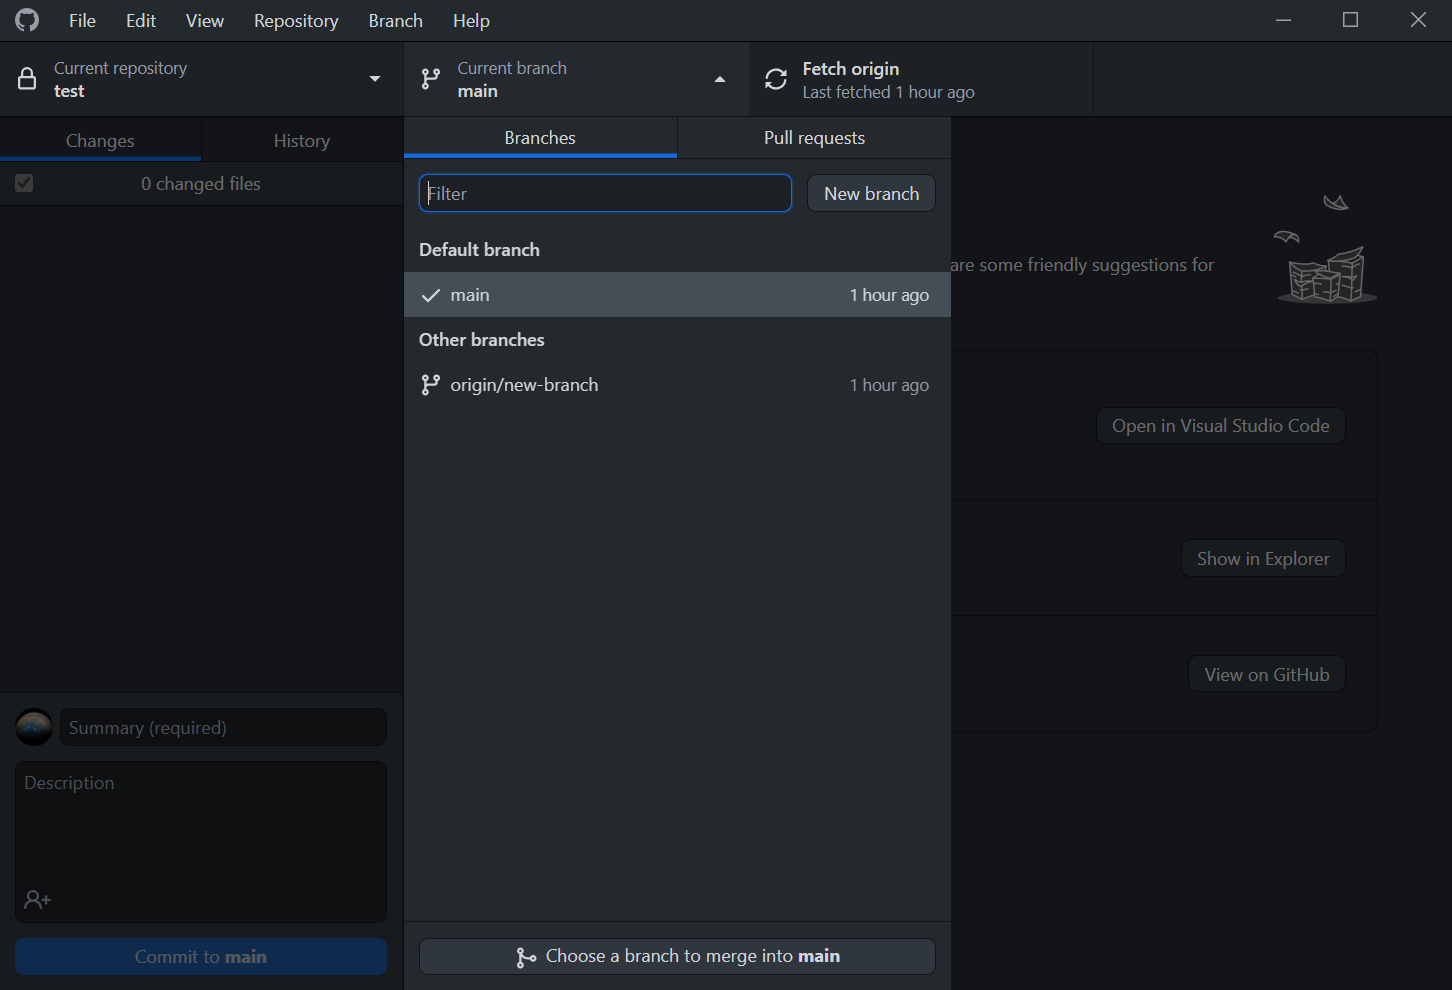
Open Github Desktop and click "Fetch Origin". Now, when you click on the "current branch" tab, you should be able to see all the branches in your repository. Make sure to click on that branch you want to work on to ensure that all the changes you are making to your project are reflected on that branch.
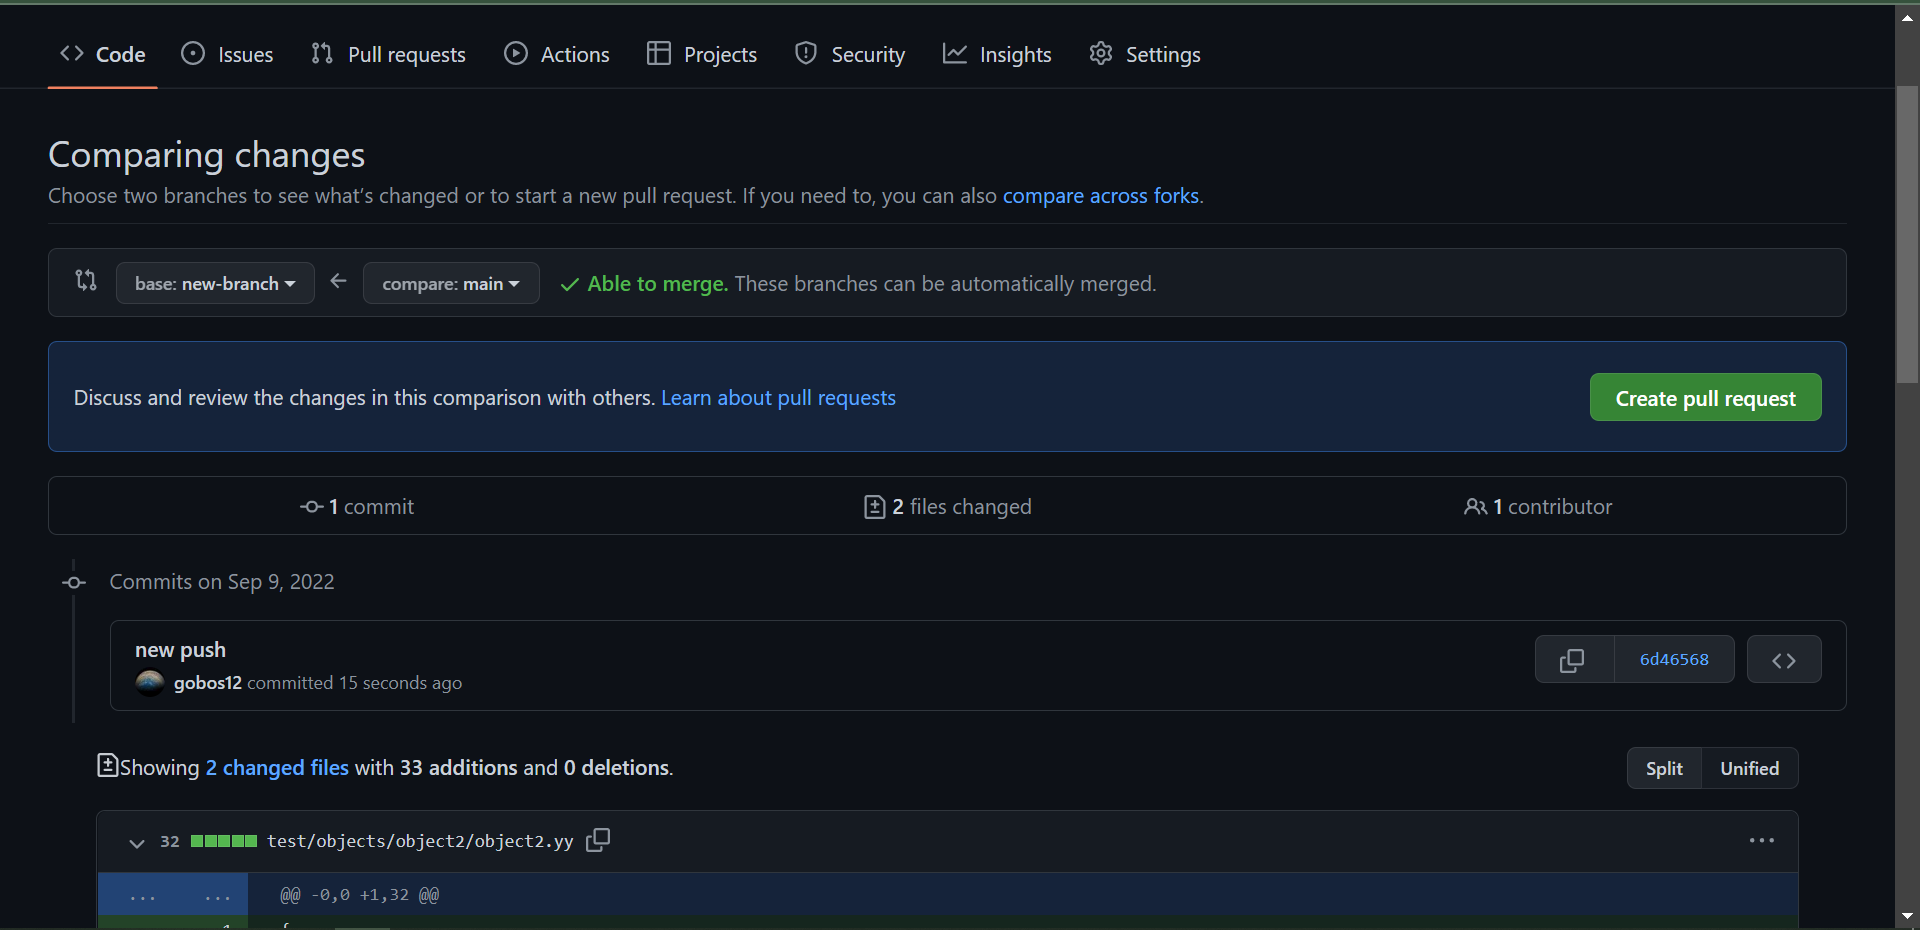
Create and commit changes on this branch like you normally would. Once you're done with implementing all the work on this branch, you want to merge this branch with main so you're changes can be reflected in the overall project. To do so create a pull request.
During the merge, you may run into some merge conflicts; this happens when git can't decide which change to approve between your branch and the main. For example, this can happen when two people make changes to the same part of the project at the same time. You can resolve merge conflicts manually, but in general they shouldn't arise.
Branches help preserve workflow and protect the main branch of the game. Never commit changes directly to main. Changes you make could corrupt the project, and if these changes are made in the main branch, it is very difficult to recover! Branches isolate your work and help you safely recombine everything together; this also acts a big undo button by being able to revert branch mergers. The main branch is your entire project, so protect it at all costs. It's also wise to make periodic backups of your main branch.
Leave a comment
Log in with itch.io to leave a comment.